Creating a Unity animated character controller with C# best practices in mind
Get started and apply some general C# coding best practices to help you create something that’s scalable from the very beginning and minimizes spaghetti code.
Preventing spaghetti code and separating concerns
One of the most common things to do in unity is create a character controller so that you can take input and make something move and interact with its environment. There are lots of options for this along with tutorials on how to create your own, but what is often overlooked is how to make something that is maintainable and can scale as your game becomes more complex. Most tutorials produce code like this which is fine for understanding the basics of locomotion in Unity, but not something you would want to replicate for a character controller that will eventually have dozens of states.
public void Update()
{
	...

    if (wantingToSprint && areWeGrounded && !areWeCrouching)
    	currentSpeed = sprintMoveSpeed;
    else if (!areWeCrouching && areWeGrounded)
    	currentSpeed = walkMoveSpeed;
    if(wantingToCrouch && jumpCrouching)
    	crouch = true;
    else
    	crouch = false;
    if (areWeGrounded)
    	coyoteTimeCounter = coyoteTime;
    else
    	coyoteTimeCounter -= Time.deltaTime;
    if (wantingToJump)
    	jumpBufferCounter = jumpBuffer;
    else
    	jumpBufferCounter -= jumpBuffer;
    if (coyoteTimeCounter > 0f && jumpBufferCounter > 0f && jumpCoolDownOver)
    {
    	characterController.velocity = new Vector3(characterController.velocity.X, 0f, characterController.velocity.Z);
        characterController.Move(transform.up * jumpForce);
        jumpCoolDownOver = false;
        areWeGrounded = false;
        jumpBufferCounter = 0f;
        currentSpeed = jumpMoveSpeed;
        endJumpTime = Time.time + jumpTime;
        Invoke(nameof(jumpCoolDownCountdown), jumpCooldown);
    }
    else if (wantingToJump && !areWeGrounded && endJumpTime > Time.time)
    	characterController.Move(Vector3.up * jumpAcceleration);

    ...
}
My goal in this article is to help you get started and apply some general C# coding best practices along the way to help you create something that’s scalable from the very beginning and minimizes spaghetti code like the previous example.
Prerequisites
You can download the source code from GitHub and here’s a video demo of what we are going to create:
Our starting point will be a new scene with an empty game object added to represent the player, an empty game object to parent any ProBuilder game objects, a main camera and a Cinemachine FreeLook camera. We’ll add a few basic structures to our Environment and create some InputActions.
You can download our starting point from here: https://github.com/deptagency/animated-character-controller/releases/tag/step-0
If you want to learn more about the following topics, here are some useful links:
Making something move
When creating a character controller there are a few options available:
- Character Controller component
- Rigidbody
- Rigidbody (kinematic)
- Bespoke
We’ll be using Unity’s Character Controller because we want to be able to interact with Unity’s physics (Nvidia PhysX) engine without having to implement our own collision handling but want to script how our character moves. This approach can become more restrictive when you want to have more control over collisions and outside of a tutorial we would be more likely to use a kinematic Rigidbody instead.
Configuring and abstracting our inputs
The first thing we are going to create is an interface to represent our characters' inputs. The reason for abstracting this is so that we can later reuse this controller with a different input implementation that might use something like a Nav Mesh Agent for an NPC instead of controlled input for our Player.
Since we are only concerned with locomotion, we’ll create an ILocomotionInput interface and define it like this:
using UnityEngine;

public interface ILocomotionInput
{
    public Vector3 DirectionXZ { get; }
    public float SpeedXZ { get; }
    public Quaternion RotationY { get; }
    public bool Jump { get; }
}- DirectionXZ represents the normalized direction of horizontal movement.
- SpeedXZ represents the speed of horizontal movement clamped between zero and one.
- RotationY represents the direction the character should face.
- Jump represents whether we should jump (provided other conditions for a jump are satisfied).
Now we can create a concrete implementation of this interface using Unity’s Input System:
using UnityEngine;
using UnityEngine.InputSystem;

public class ControlledThirdPersonLocomotionInput : MonoBehaviour, ILocomotionInput
{
    // Editor Settings
    public Transform Camera;
    [Range(0f, 0.5f)] public float JumpButtonGracePeriod = 0.2f;
    [Range(0f, 1f)] public float WalkSpeed = 0.5f;
    [Range(0f, 1f)] public float RunSpeed = 1f;

    // Private variables
    private Vector3 _inputDirection = Vector3.zero;
    private float? _mostRecentJumpPress;
    private bool _run = false;

    // Public variables
    public Vector3 DirectionXZ { get; private set; } = Vector2.zero;
    public float SpeedXZ { get; private set; } = 0f;
    public Quaternion RotationY { get; private set; } = Quaternion.identity;
    public bool Jump => _mostRecentJumpPress + JumpButtonGracePeriod >= Time.time;

    public void Update()
    {
        DirectionXZ = (Quaternion.AngleAxis(Camera.rotation.eulerAngles.y, Vector3.up) * _inputDirection).normalized;

        RotationY = DirectionXZ != Vector3.zero ? Quaternion.LookRotation(DirectionXZ, Vector3.up) : Quaternion.identity;

        SpeedXZ = Mathf.Clamp01(_inputDirection.magnitude) * (_run ? RunSpeed : WalkSpeed);
    }

    public void OnMovement(InputValue value)
    {
        var input = value.Get<Vector2>();

        _inputDirection = new Vector3(input.x, 0f, input.y);
    }

    public void OnJump(InputValue value)
    {
        if (value.isPressed)
        {
            _mostRecentJumpPress = Time.time;
        }
    }

    public void OnRun(InputValue value)
    {
        _run = value.isPressed;
    }
}
We set the public variables in Update which runs every tick of our game. In addition to this we have methods that get called by Unity’s Input System for OnMovement, OnJump, and OnRun.
For OnMovement we convert the Vector2 input to a Vector3 using Z instead of Y axis since Unity (by default) uses Y for the vertical axis.
OnJump we update our private variable to record the last time a jump was requested. This is so that we are more flexible in the timing of the jump input. Pressing the jump button fractionally too early can still be accepted instead of requiring pixel perfect timing.
For OnRun we just set our private variable to record the current state.
Then, each time Update runs we can project the _inputDirection relative to our camera using Quaternion.AngleAxis so that the resulting DirectionXZ is relative to the camera’s perspective. Our RotationY just points in the same direction. SpeedXZ uses the _inputDirection magnitude with a multiplier based on whether we should be walking or running.
Because this script implements MonoBehavior we can add it to our Player game object and assign the Main Camera to it. We also need to make sure that our Player game object has a Player Input component so that the Input System methods are called as we expect.

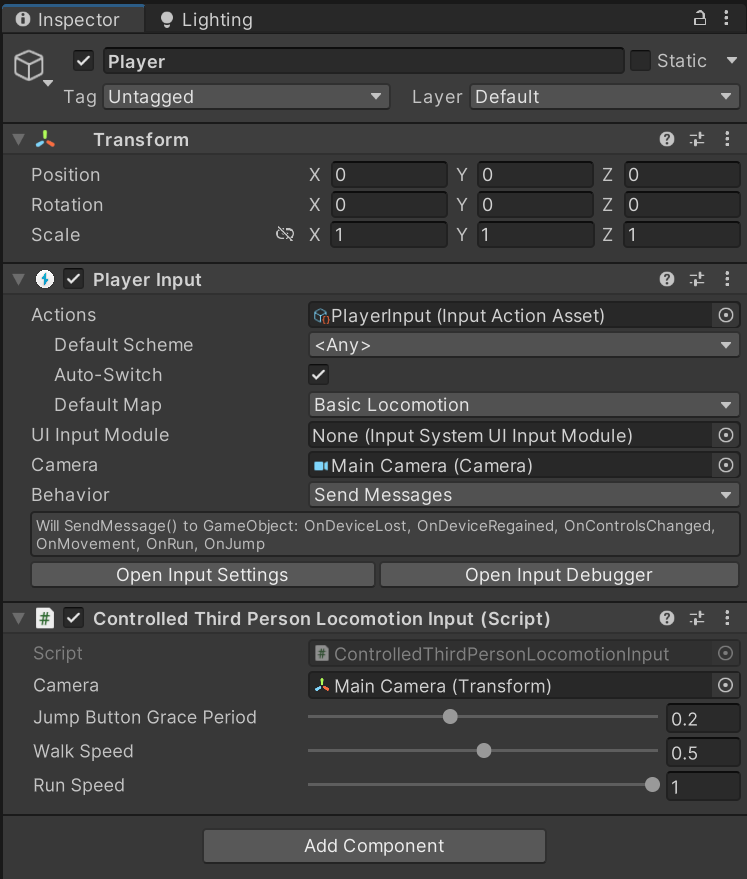
If we run the game now, we should be able to interact with our control schemes and see the values from our script change in the inspector.
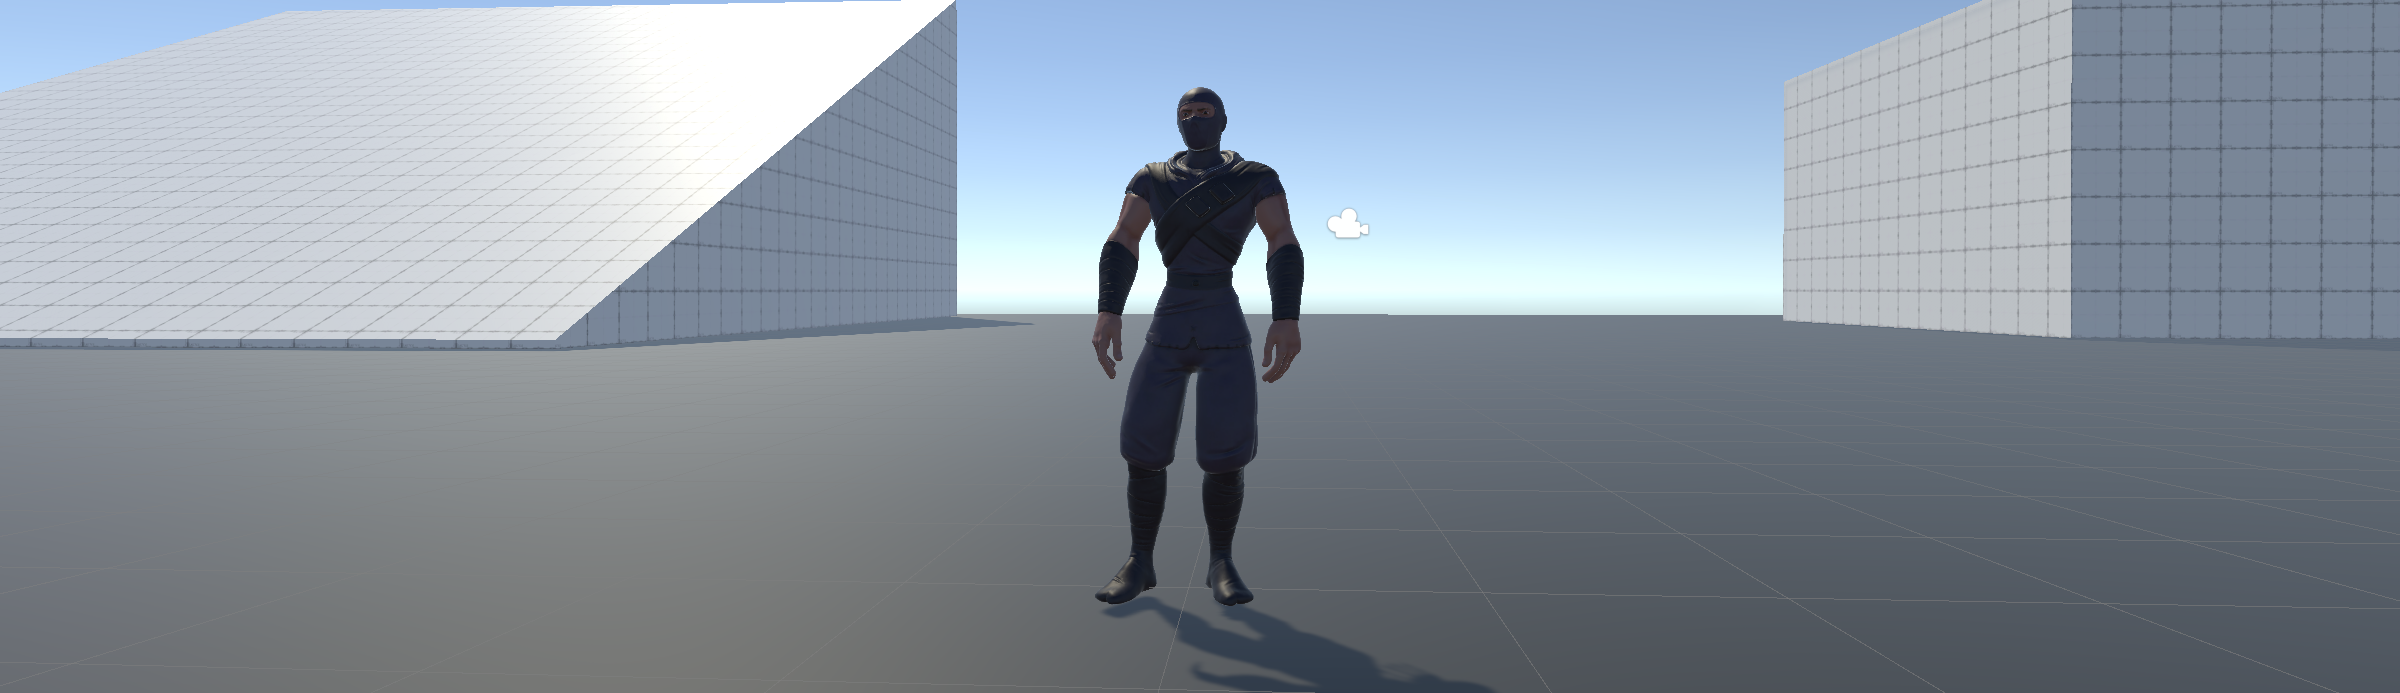
Preparing the player game object
We’re going to need something visual to know where our player is in the game world. Let’s download a free character mesh rigged for animation from Adobe’s mixamo.com. You can create a free account and then download any character you like, making sure to change the format to FBX for Unity (.Fbx).


Save this to your Assets folder and highlight it from the Project panel. In the import settings, select the Rig tab and change the Animation Type to Humanoid and apply. This will create a Unity avatar based upon this character. Then, from the Animation tab, uncheck Import Animation and apply that. We will download animations later which we can apply for this avatar. Finally, drag the character into the scene as a child of your Player game object. Rename it to Avatar and reset the transform to make sure it is facing the forward (+Z) axis.


Next thing to do is add a character controller to our Player game object. Update the Center.Y to half the height and update the height and radius until your collider covers your avatar without being oversized as shown in the example above with our Y Bot avatar. We are aligning the bottom of our collider with the floor which works well for a character controller but another popular approach is to float the collider above the feet to provide more flexibility for stair and slope traversal. This is something we might explore in a future post potentially.
Scaffolding our state machine
With our player prepared, we just need to script out some motion but we want to avoid a messy and unmaintainable codebase so we are going to script that using a state machine pattern. Many Unity tutorials for a character controller will have a single script on the Player that handles input, collisions and movement without any state management at all. This doesn’t look problematic at first when you only have a few lines of code, but as you move beyond basic movement and want to handle idle, jumping, falling states etc you start to run into trouble. In addition to spaghetti code being hard to understand and maintain because of the hierarchy of if else statements, it can also begin to impact performance when you are checking all the logic for all states on every single update. There is really no need to check our falling logic when we are grounded for example.
This is the state machine we are going to create:


A state machine works by managing a current state and owning the transition from one state to another. Individual states can implement a common abstraction that exposes methods the state machine can invoke as well as allowing states to interact with the state machine to conditionally change states or access the context to interact with other abstractions like input and our controller code.
Our state abstraction will be similar to a MonoBehavior with an Update method. We’ll have an empty constructor for any initialization (the equivalent of our Enter logic) and implement this as IDisposable (the equivalent of our Exit logic). We’ll create a new instance of our next state whenever changing states.
First we need to create our context interface:
using UnityEngine;

namespace DEPT.Unity
{
    public interface ILocomotionContext
    {
        public ILocomotionInput Input { get; }

        public void ApplyInputTranslationXZ(float speedMultiplier = 1f);
        public void ApplyInputRotationY(float speedMultiplier = 1f);
    }
}
We’ll return to this later to expose more properties and methods. Now, lets implement our abstract State Machine and State base classes:
using System;
using UnityEngine;

namespace DEPT.Unity
{
    public class StateMachine<TContext> : IDisposable
    {
        private State<TContext> _currentState;

        public TContext Context { get; private set; }
        public float ElapsedTime { get; protected set; }

        public StateMachine(TContext context)
        {
            Context = context;
        }

        public void ChangeState<T>() where T : State<TContext>
        {
            if(_currentState?.GetType() != typeof(T))
            {
                _currentState?.Dispose();

                ElapsedTime = 0f;

                _currentState = (T)Activator.CreateInstance(typeof(T), this);
            }
        }

        public virtual void Update()
        {
            ElapsedTime += Time.deltaTime;
            _currentState?.Update();
        }

        public void Dispose()
        {
            _currentState?.Dispose();
        }
    }
}
This will show errors until we implement the abstract State class below but as you can see just handles changing from one state to another and allowing the current state to be updated.
using System;

namespace DEPT.Unity
{
    public abstract class State<TContext> : IDisposable
    {
        protected StateMachine<TContext> StateMachine { get; }

        public State(StateMachine<TContext> stateMachine)
        {
            StateMachine = stateMachine;
        }

        public virtual void Update()
        {

        }

        public virtual void Dispose()
        {

        }
    }
}
We implement the methods as virtual so that they can be optionally overridden as needed. Next we can create our first state.
Moving state & basic locomotion
The first state we are going to create is our Moving state. In this state we can move around horizontally. This is where we will be able to use our ILocomotionContext to indirectly apply changes to our Character Controller. Instead of writing that code within the state for that we are going to use methods from ILocomotionContext that we will implement shortly. We do this so that we can avoid repeating the same logic in multiple places as several states will want to be able to move the character in this way.
using UnityEngine;

namespace DEPT.Unity
{
    public class MovingState : State<ILocomotionContext>
    {
        public MovingState(StateMachine<ILocomotionContext> stateMachine) : base(stateMachine)
        {

        }

        public override void Update()
        {
            StateMachine.Context.ApplyInputTranslationXZ(5f);
            StateMachine.Context.ApplyInputRotationY(10f);
        }
    }
}
The last thing we need is to create our implementation of ILocomotionContext. This governs the construction of our state machine and subsequent updates but also encapsulates any shared logic that we need to implement for controlling the character. By implementing MonoBehavior also we can add this script as a component for our Player game object.
using UnityEngine;

namespace DEPT.Unity
{
    public class LocomotionController : MonoBehaviour, ILocomotionContext
    {
        private CharacterController _characterController;
        private StateMachine<ILocomotionContext> _stateMachine;
        private Vector3 _cumulativeTranslation = Vector3.zero;

        public CollisionFlags Flags { get; private set; } = CollisionFlags.None;
        public ILocomotionInput Input { get; private set; }

        public void Awake()
        {
            Input = GetComponent<ILocomotionInput>();
            _characterController = GetComponent<CharacterController>();
        }

        public void Start()
        {
            _stateMachine = new StateMachine<ILocomotionContext>(this);

            _stateMachine.ChangeState<MovingState>();
        }

        public void Update()
        {
            _stateMachine.Update();

            Flags = _characterController.Move(_cumulativeTranslation);

            _cumulativeTranslation = Vector3.zero;
        }

        public void ApplyInputRotationY(float speedMultiplier = 1f)
        {
            transform.rotation = Quaternion.Slerp(transform.rotation, Input.RotationY, speedMultiplier * Time.deltaTime);
        }

        public void ApplyInputTranslationXZ(float speedMultiplier = 1f)
        {
            _cumulativeTranslation += Input.SpeedXZ * speedMultiplier * Time.deltaTime * Input.DirectionXZ;
        }
    }
}
We have a Start method to retrieve any required components from our game object (and its children) and construct our state machine before setting the initial state.
We have an ApplyInputRotationY method to immediately rotate our game object but Slerp to avoid rotating too fast. We apply this directly to our transform because Unity’s Character Controller doesn’t deal with rotation. We also have an ApplyInputTranslationXZ method to accumulate translations to be later applied during our Update. We do this to avoid our character controller having to move the transform multiple times per tick.
Our Update method runs every tick and first updates the state machine (which subsequently updates the current state), before we use our character controller to move the game object based on our cumulative translation vector. Finally, we reset that cumulative translation vector to zero so that we don’t reapply the same translations repeatedly.
We can now drag this script component onto our Player game object and play the scene to test our basic movement and should see something like this:
Animation & root motion
Adobe Mixamo.com
Now we have a moving character, we should introduce some animation. However, we need to consider the concept of root motion before doing so. Root motion uses translation and rotation in the animations to apply motion to our character. Its advantage is that it avoids visual defects by misaligned motion and animation such as a sliding effect when the character moves faster and slower than the animation itself. We could use in-place animations but lets download some animations that are designed to use root motion and update our Moving state to utilize root motion instead.
The first thing we need to do is grab some animations so let’s return to Adobe’s mixamo.com and this time, go to the animations tab.
Download the following animations making sure to leave the in-place option unchecked:
- Walking
- Running
Save these to your Assets folder and highlight them from the Project panel. In the import settings, select the Rig tab and change the Animation Type to Humanoid, updating Avatar Definition to Copy From Other Avatar and selecting the avatar from earlier. Apply our changes. Then, from the Animation tab, check Loop Time and bake the Original root transform rotation and position (Y) to only keep root motion on the XZ plane.
Mecanim animation system
Now that we have some animations we can use Unity’s Mecanim Animation System to create some animation states and parameters for our base layer. This is also a state machine implementation that could be used with behaviors to separate concerns but is more suited to visual development than C# programming and can be opinionated when it comes to transitions and customization.
Instead of having transitions and letting Mecanim decide what animation state is active, we will control the Animator from within our state machine implementation. As such, all we need are the states themselves and any parameters that are required by blend trees. There are lots of really detailed tutorials on the animation system and how it works but for these two animations we are simply going to create a 1D blend tree with 3 motions: Walking slowly, Walking, and Running. For Walking slowly we will just reuse the same Walking animation but play it at 0.5 speed. The blend parameter can be named SpeedXZ. Create an additional float parameter called SpeedY that we will use later too.


Scripting our animator
Back in the code we will update our scripts to support root animation before applying it from our Moving state. First thing we need is a script to manage interactions with the Animator:
using UnityEngine;

namespace DEPT.Unity
{
    [RequireComponent(typeof(Animator))]
    public class LocomotionAnimator : MonoBehaviour
    {
        private Animator _animator;

        private int _speedXZHash;
        private int _speedYHash;
        private Vector3 _cumulativeDeltaPosition = Vector3.zero;

        public void Awake()
        {
            _animator = GetComponent<Animator>();

            _speedXZHash = Animator.StringToHash("SpeedXZ");
            _speedYHash = Animator.StringToHash("SpeedY");
        }

        public void OnAnimatorMove()
        {
            _cumulativeDeltaPosition += _animator.deltaPosition;
        }

        public Vector3 ProcessRootMotionTranslation()
        {
            var rootMotion = _cumulativeDeltaPosition;

            _cumulativeDeltaPosition = Vector3.zero;

            return rootMotion;
        }

        public void SetSpeedXZ(float speedXZ, float deltaTime)
        {
            _animator.SetFloat(_speedXZHash, Mathf.Clamp(speedXZ, 0f, 1f), 0.1f, deltaTime);
        }

        public void SetSpeedY(float speedY, float deltaTime)
        {
            _animator.SetFloat(_speedYHash, Mathf.Clamp(speedY, 0f, 1f), 0.1f, deltaTime);
        }

        public void CrossFadeInFixedTime(int stateHashName, float fixedTransitionDuration = 0.1f)
        {
            _animator.CrossFadeInFixedTime(stateHashName, fixedTransitionDuration);
        }
    }
}
This script exposes methods to process (and reset) the root motion translation, update our Animator parameters such as SpeedXZ and SpeedY, and can cross fade to a specific animation state.
Refactor to integration animation for our state machine
This is added to our Avatar game object and next we can update our ILocomotionContext interface:
namespace DEPT.Unity
{
    public interface ILocomotionContext
    {
        ...
        public LocomotionAnimator Animator { get; }

        ...
        public void ApplyRootMotionTranslation();
    }
}
We can now access our Animator from the ILocomotionContext in our state machine along with a method for applying root motion translation in our controller. Next we can update our LocomotionController to implement these new additions:
using UnityEngine;

namespace DEPT.Unity
{
    public class LocomotionController : MonoBehaviour, ILocomotionContext
    {
        ...
        public LocomotionAnimator Animator { get; private set; }

        public void Awake()
        {
            ...
            Animator = GetComponentInChildren<LocomotionAnimator>();
            ...
        }

        ...

        public void Update()
        {
            Animator.SetSpeedXZ(Input.SpeedXZ, Time.deltaTime);
            ...
        }

        ...

        public void ApplyRootMotionTranslation()
        {
            _cumulativeTranslation += Animator.ProcessRootMotionTranslation();
        }
    }
}
The last change is for our Moving state:
using UnityEngine;

namespace DEPT.Unity
{
    public class MovingState : State<ILocomotionContext>
    {
        public MovingState(StateMachine<ILocomotionContext> stateMachine) : base(stateMachine)
        {
            StateMachine.Context.Animator.CrossFadeInFixedTime(Animator.StringToHash("Moving"), 0.1f);
        }

        public override void Update()
        {
            StateMachine.Context.ApplyRootMotionTranslation();
            StateMachine.Context.ApplyInputRotationY(10f);
        }
    }
}
In the constructor we can cross fade to our Moving animation state and in Update we replaced our ApplyInputTranslationXZ with an alternative method call to ApplyRootMotionTranslation instead. Root motion could potentially affect our Y translation but because we baked the original root transform position (Y) in the animation clips that won’t be the case. We could implement something similar for root motion rotation but our animations don’t have any rotation so we aren’t concerned with that right now either.
If we run the game now we will have animated movement and be able to see the blend tree in effect when we press the run key (left shift) / button (gamepad west). We still move forward slowly even without any input but we will address this in the next section when adding additional states such as Idle.
Hierarchy & sub-states
Transitioning between states
We are at a point where we can start to see the benefit of our state machine now. We are going to add our second state which will be Idle and implement conditions for transitioning between the Moving and Idle states. This will prevent our character from moving when we don’t have any controller input. Idle is typically a more sensible starting state too, so we will update that at the same time.
We’ll need to download an Idle animation from Mixamo. Follow the same steps from earlier for an Idle animation and update the Import settings to use a humanoid rig with our avatar and bake the original rotation, and position across XZ and Y axis. Make sure you name the animation Idle and drag it into the Animator to create an animation state of the same name for that motion. Update the layer to use Idle as our default state and we are ready to make our script updates.
We will start by creating our new Idle state:
using UnityEngine;

namespace DEPT.Unity
{
    public class IdleState : State<ILocomotionContext>
    {
        public IdleState(StateMachine<ILocomotionContext> stateMachine) : base(stateMachine)
        {
            StateMachine.Context.Animator.CrossFadeInFixedTime(Animator.StringToHash("Idle"), 0.1f);
        }

        public override void Update()
        {
            if (StateMachine.Context.Input.DirectionXZ.magnitude > 0f)
            {
                StateMachine.ChangeState<MovingState>();
            }
        }
    }
}
This is very similar to our moving state but we don’t call any methods to rotate or translate our character while Idle. Instead, we check for input magnitude and conditionally change to a Moving state. We can update our Moving state to include an inverse condition to conditionally change to an Idle state if we don’t have any input magnitude:
using UnityEngine;

namespace DEPT.Unity
{
    public class MovingState : State<ILocomotionContext>
    {
        ...

        public override void Update()
        {
            ...

            if (StateMachine.Context.Input.DirectionXZ.magnitude == 0)
            {
                StateMachine.ChangeState<IdleState>();
            }
        }
    }
}
We can also optionally update our LocomotionController to use IdleState for the initial state change but these conditions would ensure that we quickly change to the correct state regardless of which starting state we choose.
Grounded state and sub-states
We are now able to navigate our horizontal XZ plane but have not yet introduced the concept of gravity to ensure that our character remains grounded. If we remove the floor we continue to move horizontally but that’s not acceptable. Before we can introduce gravity we are going to create a Grounded state that encapsulates already being on the ground and we’ll move our Idle and Moving states to a sub-state machine within our Grounded state. This will allow us to avoid duplicating any logic that applies to both Idle and Moving and putting it in our Grounded state instead.
using DEPT.Unity;

public class GroundedState : State<ILocomotionContext>
{
    private readonly StateMachine<ILocomotionContext> _subStateMachine;

    public GroundedState(StateMachine<ILocomotionContext> stateMachine) : base(stateMachine)
    {
        _subStateMachine = new StateMachine<ILocomotionContext>(StateMachine.Context);

        if (StateMachine.Context.Input.DirectionXZ.magnitude > 0f)
        {
            _subStateMachine.ChangeState<MovingState>();
        }
        else
        {
            _subStateMachine.ChangeState<IdleState>();
        }
    }

    public override void Update()
    {
        _subStateMachine.Update();
    }

    public override void Dispose()
    {
        _subStateMachine.Dispose();

        base.Dispose();
    }
}
This Grounded state doesn’t map to an animation state. It’s only concerned with constructing a sub-state machine and conditionally setting its starting state to either Idle or Moving based on the input direction magnitude. It updates the sub-state machine every time it updates itself, and disposes the sub-state machine when it is disposed of. We can update our LocomotionController to use GroundedState as the initial state it changes to and everything continues to work the same way as before, but now we are ready to introduce another new state to represent our character Falling.
Going airborne
Velocity & Gravity
Before we can fall we are going to need to be able to translate our character based on the effect of gravity. Gravity is usually approximated as an acceleration of 9.81m/s/s which means that every second the velocity on the -Y axis should increase by 9.81m/s which in turn means that every second the translation should changes based on the cumulative velocity produced by gravitational acceleration. Most games also include a multiplier so that gravity is higher than on Earth’s surface because this combined with a less realistic higher jump velocity produces that arcade feel.
We’re going to need to update our LocomotionController to support cumulative velocity and handle the gravitational acceleration. Let’s start with our ILocomotionContext interface:
using UnityEngine;

namespace DEPT.Unity
{
    public interface ILocomotionContext
    {
        ...
        public bool IsGrounded { get; }
        public Vector3 CumulativeVelocity { get; }
        ...
    }
}
Now we can update our LocomotionController with some additional properties:
private float _initialStepOffset;
private Vector3 _gravity = Physics.gravity;

[Range(0.1f, 5f)] public float GravityMultiplier = 2f;
[Range(0f, 100f)] public float TerminalVelocity = 50f;

public bool IsGrounded => _characterController.isGrounded;
public Vector3 CumulativeVelocity { get; private set; }
Add a method to handle the velocity:
private void ApplyVelocity()
{
    if (IsGrounded && CumulativeVelocity.y < 0f)
    {
        CumulativeVelocity = new Vector3(CumulativeVelocity.x, -_initialStepOffset, CumulativeVelocity.z);
    }
    else
    {
        CumulativeVelocity = Vector3.ClampMagnitude(CumulativeVelocity + (_gravity * GravityMultiplier * Time.deltaTime), TerminalVelocity);
    }

    _cumulativeTranslation += CumulativeVelocity * Time.deltaTime;
}
When we are grounded and not moving upwards (+Y) we won’t apply gravity but will gently push our player into the ground using -_initialStepOffset. We do this to ensure that our grounded collisions don’t suffer from the physics engine trying to resolve a collision and attempting to move our character just above the ground. Without this we could alternate between being Grounded and Falling every tick. If we aren’t grounded, we apply gravitational acceleration to our cumulative velocity but clamp to a terminal velocity to ensure there is a sensible maximum limit applied to our locomotion. We can set the value of _initialStepOffset in our Start method using our _characterController.stepOffset.
We need to apply these changes in our Update method:
public void Update()
{
    Animator.SetSpeedXZ(Input.SpeedXZ, Time.deltaTime);
    Animator.SetSpeedY(CumulativeVelocity.y / TerminalVelocity, Time.deltaTime);

    _stateMachine.Update();

    ApplyVelocity();

    Flags = _characterController.Move(_cumulativeTranslation);

    _cumulativeTranslation = Vector3.zero;
}
You might have noticed that we are also setting the SpeedY parameter for our LocomotionAnimator so let’s update that next using the same approach as we already have for SpeedXZ.
Animating our descent
With the code in place we can create some animations for falling and landing along with equivalent states in our state machine. From mixamo.com, download animations for Falling Idle (renamed to Falling) and Falling to Landing (renamed to Landing) and Falling (renamed to Freefall). Update the import settings to use our Humanoid rig and avatar, and bake original rotation and position for all animations. Falling Idle and Falling can Loop Time also. Create a new 1D Blend Tree in your Animator called Falling and add motions for Falling and Freefall. Associate it with a new float property called SpeedY. It should look something like this:


Also drag your Landing animation into the Animator base layer to create a Landing animation state too. With the animation clips in place, let’s create our states:
using UnityEngine;

namespace DEPT.Unity
{
    public class LandingState : State<ILocomotionContext>
    {
        public LandingState(StateMachine<ILocomotionContext> stateMachine) : base(stateMachine)
        {
            StateMachine.Context.Animator.CrossFadeInFixedTime(Animator.StringToHash("Landing"));
        }

        public override void Update()
        {
            if (StateMachine.ElapsedTime > 0.5f - StateMachine.Context.Input.SpeedXZ)
            {
                StateMachine.ChangeState<GroundedState>();
            }
        }
    }
}
This Landing state is really simple and just waits up to a maximum of 0.5 seconds before transitioning to our Grounded state. The faster we are moving horizontally, the less time we will spend in a Landing state. This state could also include a condition to immediately switch to a Falling state if we are no longer grounded to cater for cases where we only land momentarily but that’s a corner case we don’t need to handle right now.
Next is our Falling state:
using UnityEngine;

namespace DEPT.Unity
{
    public class FallingState : State<ILocomotionContext>
    {
        public FallingState(StateMachine<ILocomotionContext> stateMachine) : base(stateMachine)
        {
            StateMachine.Context.Animator.CrossFadeInFixedTime(Animator.StringToHash("Falling"), 0.1f);
        }

        public override void Update()
        {
            StateMachine.Context.ApplyInputTranslationXZ(5f);

            if (StateMachine.Context.IsGrounded)
            {
                StateMachine.ChangeState<LandingState>();
            }
        }
    }
}
Our Update method simply enables horizontal translation while falling and checks if we are grounded to conditionally change to the Landing state. We can adjust the multiplier for our movement if we want to be able to move less while airborne.
We now can change from Falling to Landing, and Landing to Grounded but we need to update our Grounded state to conditionally change to Falling before we can test this. In the GroundedState add the following condition to the end of our Update method:
if(!StateMachine.Context.IsGrounded)
{
    StateMachine.ChangeState<FallingState>();
}
If we run the game now, we should see our animated states in effect including a freefall animation as we approach terminal velocity.
Jumping
Since the hardest part of a jump is returning to the ground, adding a Jump state is pretty trivial. We’ll need to download another mixamo.com animation and import it in the usual way, baking the rotation and position for our downloaded animation clip. Dragging that into our Animator will create the animation state, and then we can script our Jump.
Add a float JumpHeight property defaulting to 2f along with a Jump method to our LocomotionController:
public void ApplyJump()
{
    var jumpVelocity = new Vector3(0f, Mathf.Sqrt(JumpHeight * -3f * _gravity.y), 0f);

    ApplyVelocity(jumpVelocity);
}
The jump velocity approximates the velocity necessary to overcome gravity and reach the defined jump height. Make sure to update ILocomotionContext to include this method so that we can call it from our states. With that in place, we can create our Jumping state:
using UnityEngine;

namespace DEPT.Unity
{
    public class JumpingState : State<ILocomotionContext>
    {
        public JumpingState(StateMachine<ILocomotionContext> stateMachine) : base(stateMachine)
        {
            StateMachine.Context.Animator.CrossFadeInFixedTime(Animator.StringToHash("Jumping"), 0.1f);

            StateMachine.Context.ApplyJump();
        }

        public override void Update()
        {
            StateMachine.Context.ApplyInputTranslationXZ(5f);

            if (StateMachine.Context.CumulativeVelocity.y < 0f)
            {
                StateMachine.ChangeState<FallingState>();
            }
        }
    }
}
We call the Jump method from the constructor and our Update method enables horizontal movement and checks when we reach the peak of our jump to transition to a Falling state.
We only want to be able to jump from a Grounded state, so update our GroundedState Update method to include the following condition:
public override void Update()
{
    ...

    if (StateMachine.Context.Input.Jump)
    {
        StateMachine.ChangeState<JumpingState>();
    }
}
If we test the jump now we’ll notice that the character jumps immediately but the animation crouches first giving an undesirable visual. We could use a coroutine to delay the change in velocity but I prefer an immediate jump so instead I will trim the animation clip to begin as the characters feet should leave the ground.


For the animation clip I chose, trimming the first 14.5ms is optimal. The last visual defect is a noticeable tilt as we transition from jumping to falling animation clips. This is because the falling animation start position and rotation is different to the end of the jumping animation end position and rotation. We can duplicate and edit our falling animation clip to fix this in Unity. Instead of covering that here, you can take a look at this video tutorial which is part of an excellent channel and series that covers Unity character controllers: https://youtu.be/hfBdtkC-nLg.
Summary
In the interest of brevity, there are some additional things we would typically implement that have been omitted from this tutorial. Some obvious next steps would include:
- Projecting our movement onto a ground plane using its normal (the vector describing the orientation of a surface). This means that if we descend a slope we’ll bounce down as we alternate between falling and grounded states. By casting a ray down and getting the normal of the ground we can orient our movement along the ground to avoid this.
- Implement a better way to navigate stairs. The character controller we used supports
stepOffsetalready but it’s a very crude implementation that we would normally enhance for a less jerky motion. - Replace the use of
Activator.CreateInstancein ourStateMachinewith an injected factory.
The purpose of the tutorial was to demonstrate the value of a state machine in the context of Unity character controllers and hopefully the benefit of this pattern was self-evident as we added more states to our character. We also demonstrated a structure that embraced SOLID principles so that we could change implementations like ILocomotionInput to reuse our character controller for other game objects like an NPC.
If you’re interested in learning more about DEPT’s capabilities with Unity for Gaming, XR, and experience development, or C# .NET in general, please reach out to us to discuss more.